Integrating your GitHub repository
Discover how to seamlessly integrate your GitHub repository with Zerops for automated builds and deployments.
You can choose between two powerful integration approaches: direct integration through the Zerops GUI for straightforward setup, or GitHub Actions for more customized deployment workflows.
This guide walks you through both integration methods, helping you choose and implement the approach that best fits your team's needs.
Prerequisites
Before starting the integration process, ensure your repository contains a valid zerops.yaml configuration file located in the root directory. This file is essential for defining the build, deploy, and run processes.
For detailed information on how to create or modify this file, refer to the Zerops YAML configuration guide.
Integration via Zerops GUI
Follow these steps to connect your GitHub repository directly with Zerops:
-
Access Service Settings
- Log into the Zerops GUI
- Select the relevant service from your dashboard.
- In the left-hand menu, navigate to Build, Deploy, Run Pipeline Settings.
-
Connect to GitHub
- Click Connect with a GitHub repository
- You'll be prompted to authorize Zerops to access your GitHub account.
- Grant the necessary permissions for Zerops to manage webhooks and fetch your code.
Zerops requires full access to your repository in order to configure webhooks and pull the latest code changes. However, Zerops does not store your source code unless explicitly specified by you.
-
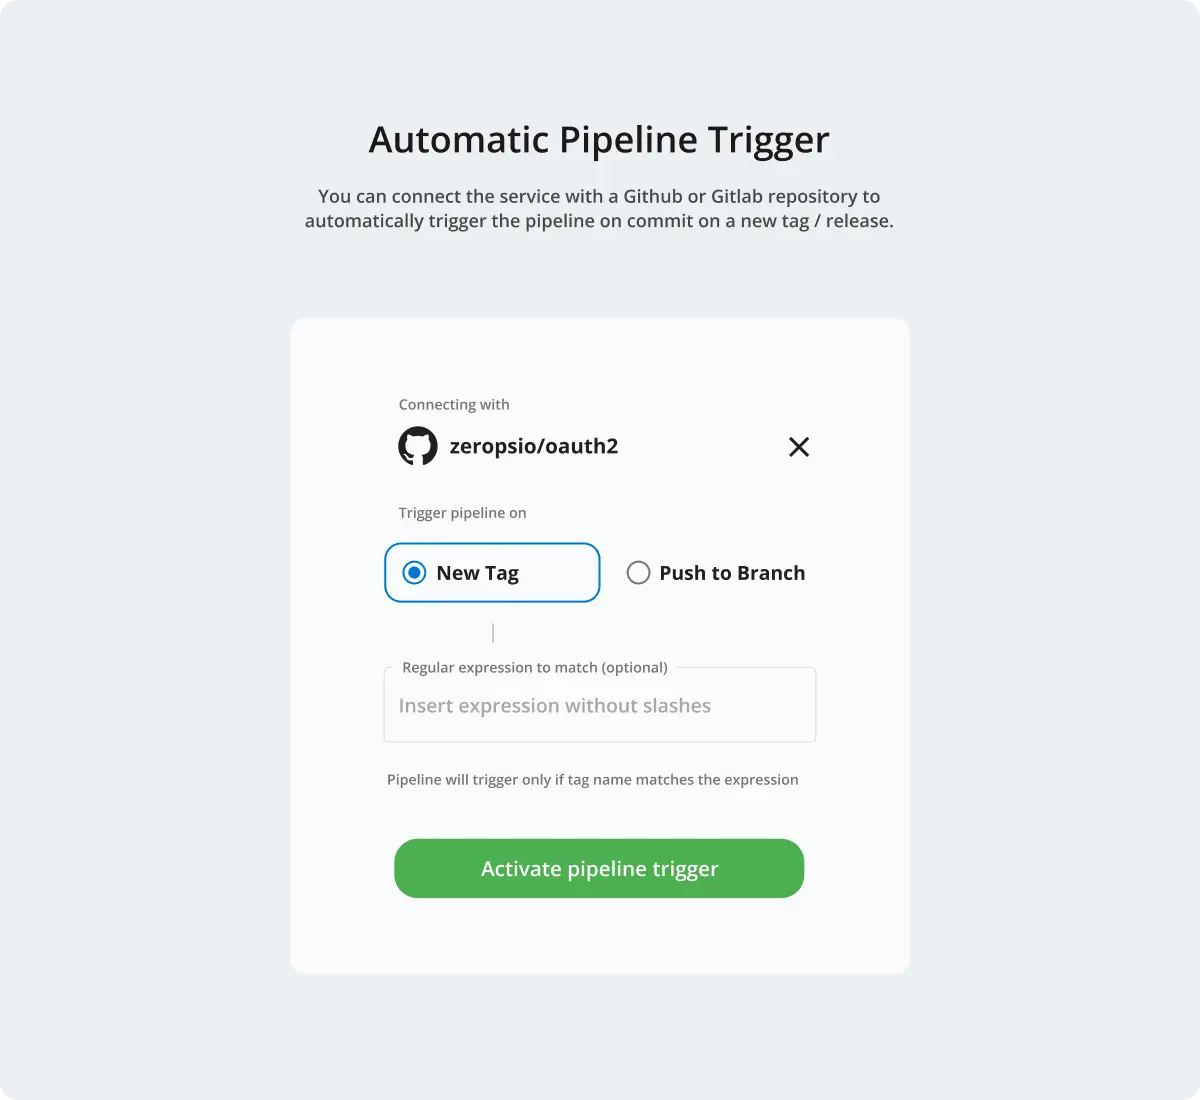
Select Repository and Trigger
- Choose the GitHub repository you'd like to integrate with Zerops.
- Configure the trigger that will initiate a build:
- New tag: Builds are triggered whenever a new tag is created. This is the recommended option for production deployments.
- You can optionally add a regular expression (regex) to filter specific tags.
- Push to branch: Builds are triggered on every push to a specified branch, such as
mainordevelop.
- New tag: Builds are triggered whenever a new tag is created. This is the recommended option for production deployments.
-
Finalize Setup
- Review and confirm your settings to complete the integration process.
- Your GitHub repository is now connected, and builds will be triggered based on the configured triggers.

Managing Your GitHub Integration
To skip triggering a build for a specific commit, you can include ci skip or skip ci in your commit message (case insensitive). This tells Zerops to ignore that particular commit during the build process.
Although the webhook will still be delivered to GitHub, no action will be taken if ci skip is present in the commit message.
Disconnecting Your Repository
To disconnect your GitHub repository from Zerops:
- Navigate to the Service Details page for the relevant service
- Select Build, Deploy, Run Pipeline Settings from the menu.
- Click Stop automatic build trigger
This action will remove the GitHub webhook and delete the associated integration configuration, effectively halting automated builds from this repository.

Authorizing Access to Organizations
If you want to authorize Zerops to access a specific organization, you can do so by clicking on the Grant from GitHub Applications Settings.
GitHub Workflow Integration
As an alternative to direct integration, you can use GitHub Actions to manage your deployments. This approach gives you more control over your deployment workflow and allows integration with other CI/CD processes.
GitHub Workflow using Zerops Actions
-
Create Workflow Configuration
Create a new file at
.github/workflows/deploy.yamlin your repository: -
Generate Access Token
- Navigate to Settings > Access Token Management in your Zerops dashboard
- Generate a new access token with appropriate permissions
- Copy this token for use in GitHub secrets
-
Locate Service ID
- Go to your service dashboard and click the three dots menu → Copy Service ID
- Alternatively, find it in your service URL:
https://app.zerops.io/service-stack/<your-service-id>/dashboard
-
Configure GitHub Secrets
- Go to your GitHub repository settings
- Navigate to Settings > Secrets and variables > Actions > Repository secrets
- Add a new secret named
ZEROPS_TOKENwith your access token value
Keep your access token secure and never commit it directly to your repository. The token provides administrative access to your Zerops resources.
For more information about GitHub Actions, refer to the official GitHub Actions documentation.